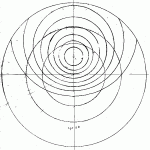
Drafting the Astrolabe: 1. Planning the Project

The first step has to be making myself a protractor. I was going to create one as a proof of concept then switch to a commercial model, but I have changed my mind. If I can make a reasonably accurate tool, I can laminate it and use it; getting rid of the need to ‘cheat’.

I’m tempted to jump right into the climate plates next; but I think that they really need to be much further down the list. The construction of the climates is the most complex and confusing and I will have to lay a lot of groundwork before I am ready to start documenting that process.

My rough schedule is as follows:

  • Explain the geometric construction techniques to be used. Number them to allow me to refer to them later.
  • Draft the protractor
  • Rough out the design for the astrolabe as a whole. I can then use this rough model to transfer measurements from for the various parts.
  • The front of the mater:
    • time scale
    • interior scale
    • throne
  • The back of the mater:
    • zodiac scale
    • calendar scale
    • unequal hour scale
    • shadow scales
    • throne
  • The climate plates.
  • The rete.
  • The alidade and rule.

Drafting the Astrolabe: Defining the project

Allowed tools:

  • Straight-edge: NOT a ruler, I need to find a nice (straight!) length of hardwood with no markings. I may cheat and use a steel yardstick.
  • Compass: I have a nice Staedtler compass, but it will not be big enough for some of the arcs required. I may add a beam compass or experiment with cord. There may be clues in the references as to how large, shallow arcs were drawn in period.
  • Dividers: I have a nice pair of dividers that may be useful in transferring measurements.
  • Paper: 8 1/2 by 11 good quality drawing paper.
  • Eraser
  • Protractor: Cheating a bit here. I will demonstrate that I can construct a protractor before I start using a commercial one, but drawing out one by hand each time I need one seems excessive, unneeded and probably not what was done in period.
  • Astronomical tables and measurements – These would have been available to an instrument maker in period.

Technique:

  • For drawings requiring excessive geometrical construction (climate plates for example), work will be done on a working copy and transferred to a clean copy.

Sources:

  • Hartmann, Georg. Hartmann’s Practika, English translation by John Lamprey, Classical Science Press, 2002
  • Morrison, James. The Astrolabe, Janus, 2007
  • Stoeffler, Johannes. Stoeffler’s Elucidatio – The Construction and Use of the Astrolabe, English translation by Alessandro Gunella and John Lamprey, Classical Science Press, 2007

Parts:
Overall, based on astrolabes from Hartmann’s era.

  • The Front:
    • Show throne, mater and limb.
    • Limb marked in hours as the class example is.
    • Mater hollow should display traditional scale.
  • The Back:
    • Elevation scale.
    • Zodiac Ring.
    • Calendar Ring (offset).
    • Unequal Hour lines.
    • 7 and 12 shadow squares.
  • Climate plates
    • At least 5. Based on the standard set listed in Stoeffler. Adding a Pennsic Plate (40-58).
    • 5 Degree intervals on both almucantar and azimuth lines.
    • 18 degree twilight line.
    • Unequal hour lines.
    • Possibly the lunar houses if I get (more) ambitious.
  • Rete
    • Drawn properly in gothic style, pointers to major stars.
    • Zodiac ring
  • Rules and alidade
    • Drawn with proper scales.
    • Both single and double rule.
    • Alidade designed with sights.

This Year’s Project

During my vacation, I spent a few hours one afternoon with a straight-edge, a compass, and my copy of Stoeffler’s Elucidatio – The Construction and Use of the Astrolabe. I was able to draw out a basic climate plate very easily; in fact I was surprised at how straight-forward it was. I am inspired to draw an astrolabe from scratch using the techniques described in the book, and to display the result at the Arts and Sciences Display during Pennsic 41.

Project: Drafting the astrolabe with straight-edge and compass

  • Using only a straight-edge, compass, and pencils, design a complete set of plans for an astrolabe.
  • Create front, back, rete, rules, and a climate plate set
  • Photocopy the above, assemble and laminate for testing.
  • Step-by-step examples of how the climates are drawn.
  • Document the whole process in this blog over the course of the year.

This project, besides being a fun challenge, will give me a more in-depth understanding of how an astrolabe works. Moreover, it will provide insight into the minds and techniques of period instrument makers, and (hopefully) provide other students a clear set of instructions for designing their own instruments.

Pennsic Postmortum

I’m back from Pennsic War XL. Still coughing up the dust, tired and happy. So starts another 50 week town run.

My two Astrolabe classes were well attended, especially in view of the fact that one was late in the day and the other was scheduled very late in the war. If I remember correctly, there were 17 people in the first and at least 16 in the the second. As usual there was a wide range of students, including a forensic astronomer in the first and a jeweler in the second (the latter wanted to know about design and construction details, she has access to a rapid prototyper and injection molding. We may have some astrolabes for sale at the war yet…)

The updated handout worked much better, as did the simplified astrolabe. The flow of the classes was smoother, and I had to spend much less time sorting out confused students.

Based on my impressions, I’m going to be overhauling the handout once again. This time, instead of a basic and advanced section, I’m going to break it into chapters; with one or two concepts per chapter. Each chapter will build on the concepts in previous chapters, and will include multiple detailed examples for each new concept, as well as a review. I’m removing the discussion on time-keeping and prayer times to an appendix, and will just reference the information I need for the examples. This will allow me to cover the basics smoothly and to adjust the class time as needed: I can cover chapters until I run out of time, some classes are faster than others; so I cover what I can and make the handout clear enough that it allows a student to work on what we couldn’t cover.

The current version of the astrolabe is pretty solid. I’m probably going to keep it as it is.

Class Handouts Posted!

The new, updated handout and set of astrolabe files to be used in my upcoming Pennsic War class can be found linked on the right.

Upcoming Pennsic Classes!

My class: The Astrolabe in Theory and Practice, will be taught at the Pennsic War. I am teaching the class twice: August 7 at 5pm and August 12 at 1pm. Handouts are limited to 15 per class with a fee of $5. Auditors welcome. The handout and the astrolabe files will be posted here the week before Pennsic at the latest.

More Updates

I made more changes to the generator. The azimuth lines are now optional, and I added an option to print just the sine scale on the back.

Swatting Bugs

I spent the last few hours noodling around with the generator code. I fixed several bugs. I also removed, at least temporarily the 6 and 12 degree twilight lines as they were cluttering up the plate and serve no real purpose.

Teaching at university.

I had my class at Atlantia University yesterday. I tried a different arrangement for the information in the class. The flow was better, but there is still too much to cover and I find my audience’s  eyes glazing by the 1:15 mark. The class was will received in any case, and I think everyone got a good grounding in the basics. The updated handout and the zip file with the demo astrolabe files is linked to the right.

In other news I will be teaching the class again next month. I’m overhauling the handout again. I think that breaking the class up into a beginning, 1 hour, section with the bare basics, followed by a second, optional hour of advanced features will work better.

Still Alive!

I’m working on completely overhauling and expanding my class handout. I’m looking to turn it into more of a useful pamphlet rather than the bare-bones outline it currently is. The results will show up in The Missing Manual soon.

In other news, I will be teaching my class: “The Astrolabe in Theory and Practice” at Atlantia University the first Saturday in March.